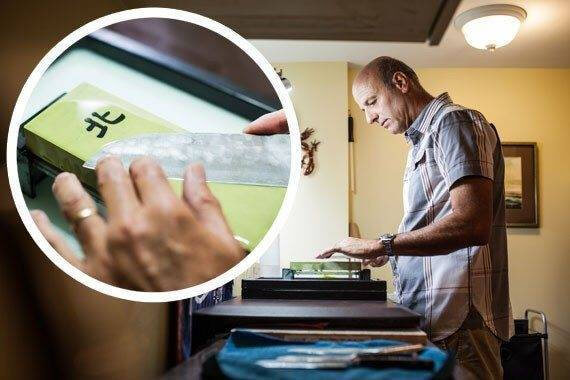
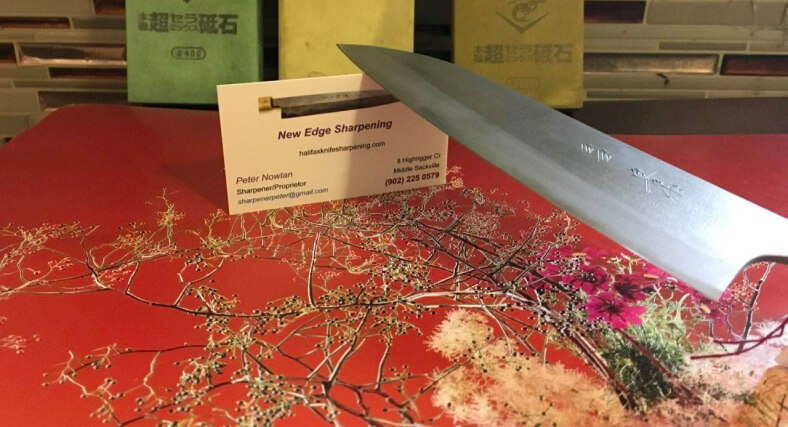
My name is Peter Nowlan and I am the owner and sharpener of New Edge Sharpening located in Nova Scotia, Canada. I started sharpening knives by hand decades ago and I served thirty six years in the Royal Canadian Navy. The fact that I started my sharpening journey back before I joined the Navy means that I’ve had many opportunities to make sharpening mistakes and to learn from them.
What I plan to do, in cooperation with KnifePlanet, is to bring a series of articles and videos to those interested that will unfold as if you went to Sharpening School designed to educate you, to enable you to take a knife, any knife from dull to exceptionally sharp. All you need to do is read and watch and practice. It’s completely free and available to anyone. The series will also feature Jon Broida for some advanced sharpening techniques. Sharpening knives is not easy, if it was, everyone would do it and you wouldn’t be reading this. However, it is not that hard, it will definitely take practice and patience.
You will need four things to go from being someone interested in learning to sharpen to someone who can make their knives sharper than new:
- Passion
- Patience
- Persistence
- Practice
As people who are interested in learning to sharpen a knife, and let’s face it, everyone is interested, there are steps that lie ahead, steps you need to take and I hope to help you navigate those steps in a logical and sensible sequence that will ultimately enable you to reach your goal, to make your knives sharper than you thought possible.
Looking for a good stone? Here’s all you need to follow our course:
Peter Nowlan’s Knife Sharpening School – An Introduction
Lessons:
#1 – The Basics of Sharpening A Knife
#2– Grasping The Sharpening Fundamentals: Sharpening On Coarse, Medium and Fine Stones
#4– Managing Pressure Levels on Coarse, Medium and Fine Water Stones
#5– How to Sharpen Single Bevel Japanese Knives
#6– Final Lesson: Sharpening a knife made simple
and more coming soon…
Join the email list to be notified when a new lesson comes out.
Sharpening Information Overload
People who become interested enough in sharpening, interested enough to be here, reading this, have also visited sharpening Forums, watched YouTube videos and done everything they can to quench their thirst for knowledge. I think it is great to do that but at some point, those awesome videos become overwhelming, they can become a source of frustration and a hindrance to you. Believe me, I have watched them all and there is only a handful that I can recommend, a handful that I think will help you. Also, you have probably watched what appears to be an endless stream of videos showing people performing miracle slices on tomatoes and grapes with their knives. I recommend that you stop watching those.
Peter Nowlan’s Knife Sharpening School – An Introduction
There’s More Than Just Sharp Knives
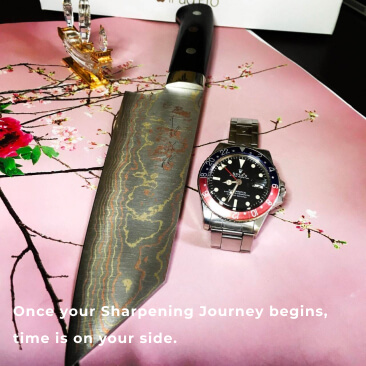
The art of knife sharpening by hand is a truly wonderful skill to learn and while you won’t realize it when your journey begins, it offers much more than just sharp knives. In fact, if all I got out of sharpening knives every day was more sharp knives, I would not be here writing this article. Which leads me to describe why I think knife sharpening is important, what do we get from it and why is it something that people can be obsessed about?
The Sharpening Journey consists of a series of stepping stones with each stone offering a different challenge and a different reward.
Until you start navigating these stepping stones, it will be difficult to comprehend what lies ahead so I will just tell you why sharpening knives is important to me.
I think of my personal sharpening journey as something in orbit around the earth, once set it motion, it is perpetual thing, I see no end to it, in fact I don’t want to end. Everyone will have their own goals and your personal journey will differ in length than mine perhaps. Certainly nothing to worry about at this stage. I can promise you however that on the horizon, the Sharpening Horizon, new elements of the process await to be discovered. New challenges will appear and new skills will unfold.
Obviously, you will want to learn to make a knife that is dull sharp, that is the ultimate goal, that is what lies ahead and for now, for a novice, that is the most important thing and it should be. As you move along however, as you progress, you will soon notice that the process automatically starts to throw other things in there for you to grab, low hanging fruit that becomes part of your sharpening routine.
There is a lot of emotional feedback that starts to weave itself into the sharpening process and you get to expect it and yearn for it and over time, that actual end result, that exceptional edge you dreamt of is but part of the process. What am I talking about:
Every single time I pick up a knife, I see a challenge and every single time I put that knife down I feel a reward. I feel pride and a sense of achievement, I feel that I have done something important and I have done it all by myself. I know that all those hours of practice and learning and being patient have enabled me to take a knife that is useless to one that is well beyond factory sharp.
Here is the key to this: I get to repeat these sensations every single day, with every knife, it doesn’t fade away and as I said, if it did, if all I got from this was a sharp knife, I would be miserable.
What does this mean to you, you may ask? It just means that sharpening knives by hand means gifts to you that will fill you with confidence and pride and ownership. You will know that what you can do is not common, it is not an easy skill to learn and you may never master it but all of it’s collateral benefits start to kick in almost immediately. Your first sharp knife will pale in comparison to the knives you sharpen a year from now and so on.
Peter Nowlan’s Knife Sharpening School – An Introduction
This is where it can get a little confusing, in your eagerness to learn you have watched videos and resourced sharpening accessories and now feel you need everything, I did and I will share my mistakes and get you started with what you really need to get that first knife to the point where you are showing your friends and family.
I focused solely on Japanese Water Stones and mainly the finishing stones, in my ignorance I thought that if I went out and got that Naniwa Chosera or Naniwa Professional 10,000 grit stone, my knives were going to become impossibly sharp. I was wrong.
You can be easily deceived into thinking this way when you see the pricing of some sharpening services, they offer lower prices for a 1,000 grit finish for example and higher prices for higher grits, so the ultimate level of sharpness is going to cost more because it is an 8,000 grit finish for example. This is not the way to think at all and it doesn’t work this way. You will learn, over time, that the best finish for your knife may be 1,000 grit, believe me, it will be sharp enough for you, for anyone for that matter.
Here is what I think is the best approach and of course it will depend on your budget. Don’t just think water stones, think of a good stone holder and a good stone flattener. These are all important and will play a role every time you sharpen a knife.
Peter Nowlan’s Knife Sharpening School – An Introduction
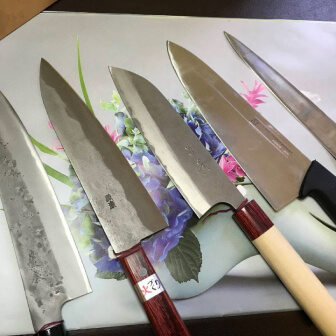
Water Stones (Whetstones) first. Whetstones are either water stones or oil stones, lubricated with water or oil. I much prefer water stones but I am not in any way suggesting you can’t sharpen a knife with an oilstone. Remember back the day when we say our Fathers and Grandfathers sharpening, they were using oilstones. I just happen to like water stones better so that is what I am more qualified to talk about.
When we sharpen we often use a combination of stones to achieve the results we seek, a progression from coarse to fine is in my opinion the optimum combination. Think of sanding a rough piece of wood with the goal of making it very smooth, we would start with some coarse sandpaper, 320 perhaps and move up to 800 grit for example or even 1,000 grit.
If we start with a knife that is dull, a knife that will not slice through a tomato without bending the tomato, you know what I mean, or will not slice through telephone book paper. The combination of stones I would use would be to start with a coarse stone ranging in grit from 220 to 800 and follow up with a medium grit stone, 1,000-3,000. Depending on the knife, the steel, I may finish on a finishing stone, 6,000 grit. There are many many combinations of grits and you’ll need to decide with which stone you want to start with based on two things:
- What stones you actually have at your disposal; and
- What the condition of the edge is.
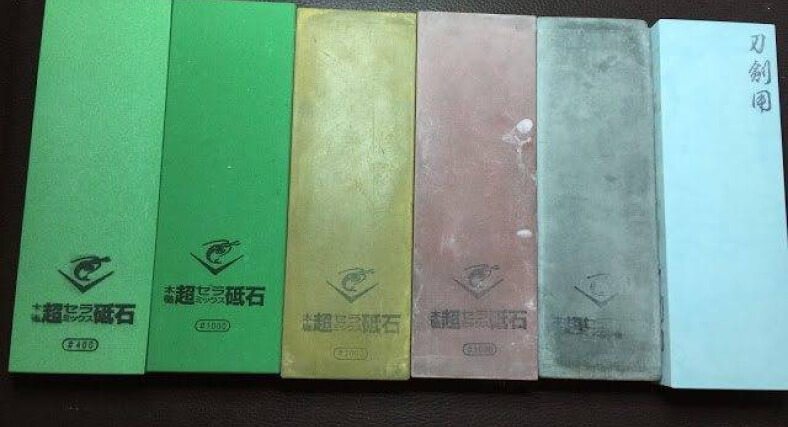
- To simplify this, you should purchase the following water stones/accessories:
- 1,000 grit Japanese Water Stone, or a combination such as 400, 1,000 and 5,000 grit;
- Japanese Water Stone flattener
- Stone holder.
- Leather Strop – This is something that can wait for now but important to consider when you get the hang of knife sharpening by hand.
- Sharpie
Get A Stone Holder: Stability Is Key
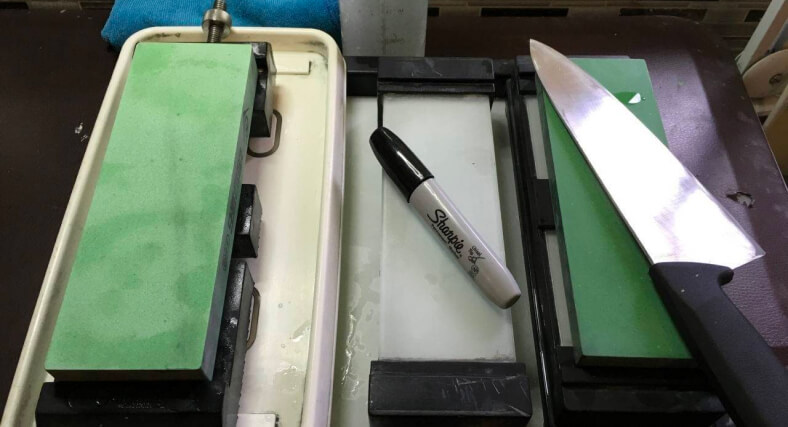
This can be as simple as piece of wood to rest the stone on over a sturdy container of water or it can be a $20.00 device that clamps the stone in place at either end and has a rubber stand that elevates the stone from the surface you work on and keeps it stable.
Stability is key here. I use Shapton stone holders, one is light and the other is a heavy stone holder, more expensive of course but exceptional quality. You don’t need these particular holders, I am just telling you what I have. It also helps to have a tray of some form to catch the water, to keep things tidy, this doesn’t have to anything special, something you already have in the house. Many people use a Sink Bridge that is easily available from the stores that sell water stones. It is stone holder that fits over the sink, so all the water and mixtures from the stones can run off directly into the sink. For me, I have a container of water off to side and I use the Shapton Pond which collects all the water and grit that comes from the stones. I don’t like the idea of it going down the drain so I just collect it in a container and dispose of it outside.
Get A Stone Holder: Stability Is Key
I think that angle control, the ability to maintain it, is the number one issue that folks have when they are about to launch themselves on their own journey. Sadly, it is often the one thing that prevents them from ever getting started. People who take a lesson from me are often surprised when it comes to trying to stabilize their knife when they start sharpening, the movement is foreign to them, it’s not easy and it becomes harder when they switch from one side of the knife to the other. The common fear is that they will damage their knife by attempting to sharpen it at an incorrect angle.
Then the first part of the magic happens: In a very short time, angle stability becomes a little easier, fears vanish as folks see that it is pretty difficult to damage a knife in this manner, in fact, I’ve never damage a knife, even in the old days and I am pretty sure that you won’t either. Remember, if you are worried about scratching the blade by getting to close to the stone you can always tape it up using painters tape leaving the edge bevels exposed. The rest of the magic reveals itself as muscle memory develops and you can’t do that on day one.
The stone is not going to grab the knife out of your hand, you’re smart, you won’t hurt the knife in this manner.
Which angle to sharpen at is another key factor to understand and I can make that easy for you as well, or at least, do my best to demystify this component of knife sharpening. You can sharpen your knife at any angle you choose, YOUR sharpening angle should be one that is best suited for your particular knife, the steel that the knife was made from. Simpler yet, you can be guaranteed that most knives are sharpened between 15 and 20 degrees, the exception being harder knives, the ones made of much better steel which can be sharpened and should be sharpened at more acute angles of 12-14 degrees.
How do we know what a 15 degree angle looks like, some may wonder? I think that is the easy part, i.e. visually identifying an angle, whether it is 15 deg or 20 deg. The angle is achieved of course by holding the spine of the knife a certain distance off of the stone, lets say 1/2 of an inch. There is a mathematical formula (sine) that can be used and it is nicely described in the awesome book, An Edge In the Kitchen by Chad Ward (Highly Recommended). Without going into much detail, you just have to measure the width of the blade at the the heel of the knife and if you want a 15 deg edge bevel on the knife you divide the width by 4. This will tell you how far to raise the spine of the knife off of the stone, so lets say it is 1/2 inch or 12.7 mm. This lets you see what the angle looks like and you could even put a few pennies down until it reaches that height or cut a wine cork to make it 12.7 mm (13 mm) and you have a little guide to rest the spine of the knife on. You could keep that home made gauge handy and pull it out, resting it on the top of the stone to provide you with a quick visual of how far to raise the spine.
Sounds pretty easy, but the easy part fades away quickly and you will discover that as you start to move the knife over the stone, you’re on your own now and you are relying on your ability to keep your hand/angle steady as you try to sharpen the knife. There is a lot going on here and it can be a little overwhelming at first but I promise you, it all gets easier with practice and persistence. You should be glad it isn’t easy, a lot of the fun is just overcoming these obstacles.
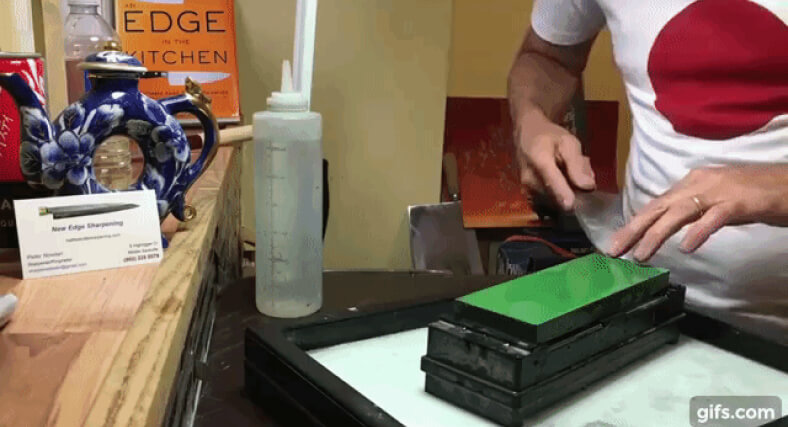
The easiest approach to this part of the process is to watch the video and then just try it out. Remember, the actual angle is not critical, I don’t know the exact angle I sharpen at, it could be 16.5 deg or 17.2 deg, it doesn’t matter, I just know that I need to hold that angle throughout the process, it takes a long time to do this but you can achieve great results during the learning process. We are humans so exact precision may not be possible, we just try our best to be as precise as we can. Sometimes, this human factor, our inability to be precise can be beneficial, we can adjust on the fly, over time, we can compensate for issues that arise as we sharpen by adjusting our angles in tiny increments.
Manage Your Expectations
Please know that it is important to manage your expectations, don’t be deceived by videos that illustrate miraculous cutting of fruit and vegetables. Focus on getting the products you need and then finding a technique that you can make your own.
As you sharpen, as you start that very cool motion of drawing the edge of the knife over the stone, remember what it is you are doing. You are bringing both sides of that knife together as best you can, as precisely as you can at the Apex of the knife. You are removing metal as gently as possible in a controlled method from both sides equally until that angle is achieved at the Apex and your Primary Edge is formed. Once it is formed, you start refining it, getting it a little sharper.
Extra Sharpening Recommendations
Do NOT start your learning process on a cheap knife, one that you would not want to own. This will set you up for frustration and break down your confidence. Use a decent knife to start, you won’t ruin it.
- Gather your materials in a place where you can work undisturbed
- Unplug yourself from social media of any time, from TV or Music, those things are unnecessary in this world
- Adopt your sharpening posture, the technique that you want to become second nature
- Set your Sharpening Journey in motion.
The article and video are designed to support each other, read and watch to get the most of this, please. Subscribe to the newsletter, I will send you an email when the next lesson comes out. You can also check this page, it will be updated when future lessons are out. Leave a comment below if you have any questions.