stropping
How to Make a DIY Two-Sided Hanging Strop From an Old Belt
17.01.2019
I come to you again with another article on knife maintenance. In my experience a knife is not truly finished being sharpened until it has been stropped thoroughly. Today I want to talk to you about making a DIY two-sided hanging strop. It’s easy, fun, and so very useful. Let’s get started.
I prefer hanging strops over hard backed (wood or MDF) strops. There are three main reasons. One, a hanging strop is more forgiving than a backed strop. Being less rigid, means it will flex more when you use it and conform more to the edge than a hard-backed strop. Two, they are more portable. You can easily throw a travel sized hanging strop in a shaving kit for a vacation. A hard-backed strop requires more dedicated space. Three, I get usage out of both sides, not just one. This gives me two different “grits” if you will.
What’s The Right Leather For a DIY Strop?
I make my hanging strops out of old leather belts. Go to any thrift store or second-hand store and look at the leather belts they have available. You are bound to find several good candidates. Let’s gather our criteria though. We cannot just purchase any old belt.

Not all of these belts can make good strops!
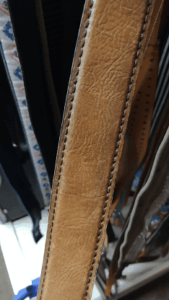
You want a leather belt with a smooth polished texture on the presentation side and a suede-like texture on the inside. Avoid canvas belts, metal grommets, braided leather, stitched sides, glued/bonded leather, embossing, or any designs. Here we see a section from my local thrift store. I’ll include several pics of bad choices. Finally, I’ll include pics of ideal leather belts.
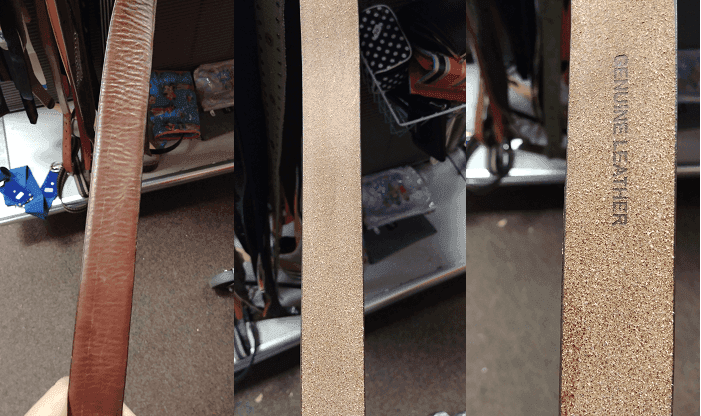
 Belt #1 – This leather belt is a bad choice as the embossing and tooling make stropping ineffective.
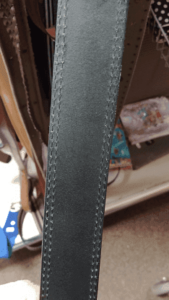
Belt #2 -This belt is smooth enough, but the stitching makes the sides useless. It also appears to be bonded. It may not even be genuine leather.
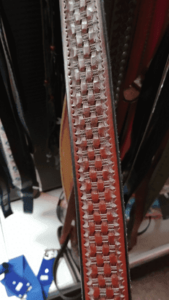
 Belt #3 -This belt is genuine leather, but the manufacturer decided to run stitching down the sides for added durability or esthetic appeal. This stitching will hamper stropping.
Belt #4 -This belt is ideal. It has a smooth presentation side with no tooling. The back side has a suede-like texture. It even has a “Genuine Leather” stamp on the back side.
You can purchase a genuine leather belt that is completely smooth on both sides. However, you will want to rough up the inside of the belt by scraping it with a file or using a palm sander. You want a rough bare leather, suede-like texture to the inside.
How to Make a DIY Leather Strop From a Belt
Once you have the proper leather belt, you can begin construction. First you want to cut off any hardware such as buckles, pins, clasps, caps, etc. Then you want to cut off the part of the belt with the holes the buckle clasped to. Now you should have a fairly straight and uniform looking piece of leather.
Now you measure the leather to see how long it is. Depending upon the length you have and how long you want to make a strop you may be able to get multiple strops from one belt. Once measured you want to cut the bet to your desired length. I find it useful to add two inches to a desired length. That will allow space for handling and hanging.
Drill a hole in one end. You will run a leather thong or some cordage through this and make a loop. This will allow you to hang the strop from a nail, hook, or drawer pull.
Load the suede-like side with polishing compound such as Aluminum Oxide (white) or Chromium Oxide (Green). Alternatively, you can apply whatever sharpening marketed polishing compound you want, such as diamond paste.
When I load a strop with compound I find it useful not to apply too much. Only apply enough to provide an observable color change in the leather. Observable is the key word. We’re not trying to paint the strop completely. I often see strops loaded with so much compound that using them becomes an exercise similar to spreading peanut butter. The compound is there to provide a microscopic abrasive element. It needs to be embedded into the suede-like fibers. If too much compound is applied you will fail to get the resistance needed for the abrasive to work.
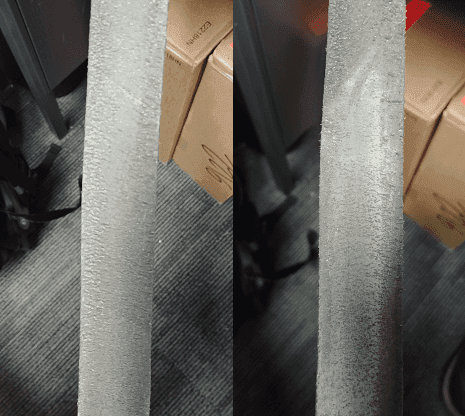
Below is a before (left side) and after (right side) of loading aluminum oxide (white compound). It is a subtle difference. But it ensures (at least in my experience) good results. You can see the white streak down the right image showing color change is beginning to take place. That’s when I stop loading.

That’s it. That’s how I build a DIY two-sided hanging strop. After I sharpen I strop on the compound loaded side for a while. Then I switch to the smooth side I have left bare. Give it a try and let me know how you fare.