Food and Recipes
Himono: Cutting, Drying and Grilling Fish The Japanese Way
06.04.2017
In the days before refrigeration, most Japanese people didn’t eat all that much raw fish. The great capital of Heian-Kyo, now Kyoto, is quite far from the sea, and so people developed a number of ways of preserving their fish so it could travel the roads from the fishing villages up to the city. One of these methods you’ve certainly heard of: sushi. In essence, they’d put preserving ingredients—vinegar, especially—into rice, which is absorbent, and wrap fresh fish around it. By the time it reached the capital, it was lightly pickled. There are still many places in Kyoto serving sushi made this way; perhaps the most popular is sabazushi, mackerel sushi. All of these are much stronger-flavored than the sushi we’re used to in the West, derived from Tokyo-style sushi, Edomaezushi, which arose as a quick street snack for the on-the-go businessman.
Another method of preserving fish is himono (干物), dried things. You can dry anything, of course, but usually himono means that you split the fish open lengthwise, salt liberally, and hang it up to air-dry overnight; these days most people use the refrigerator. Then you grill it very hot—delicious!
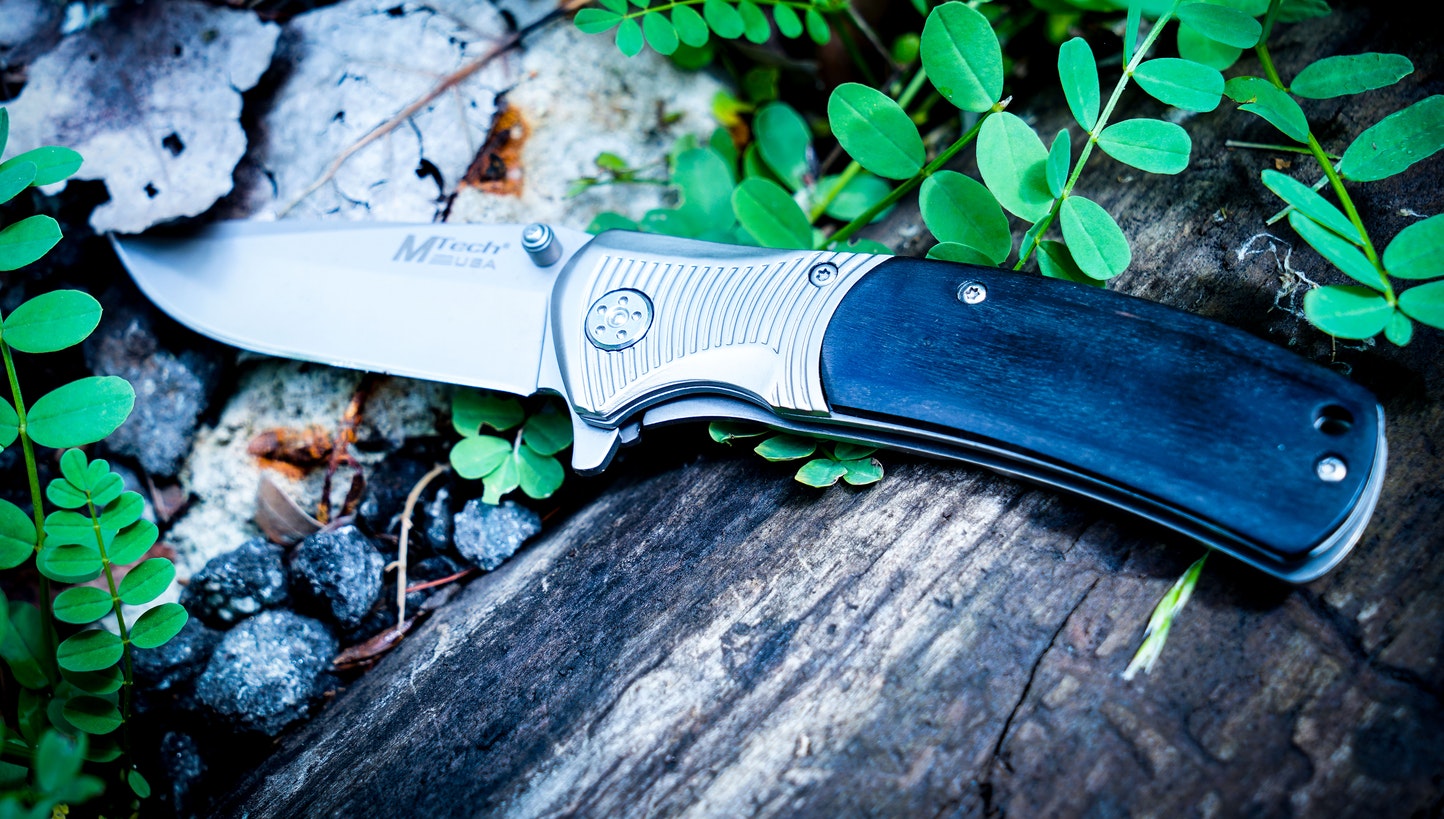
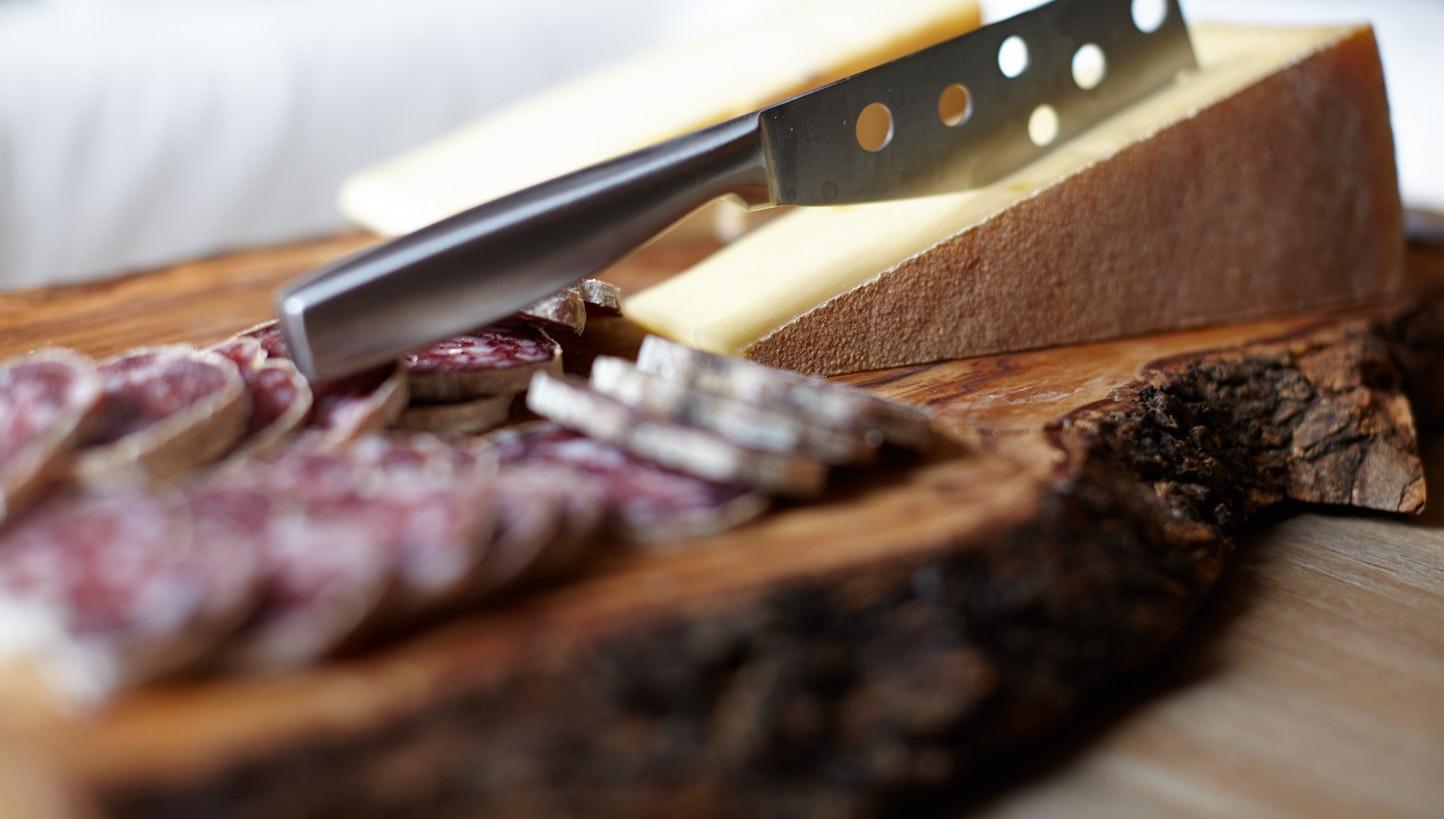
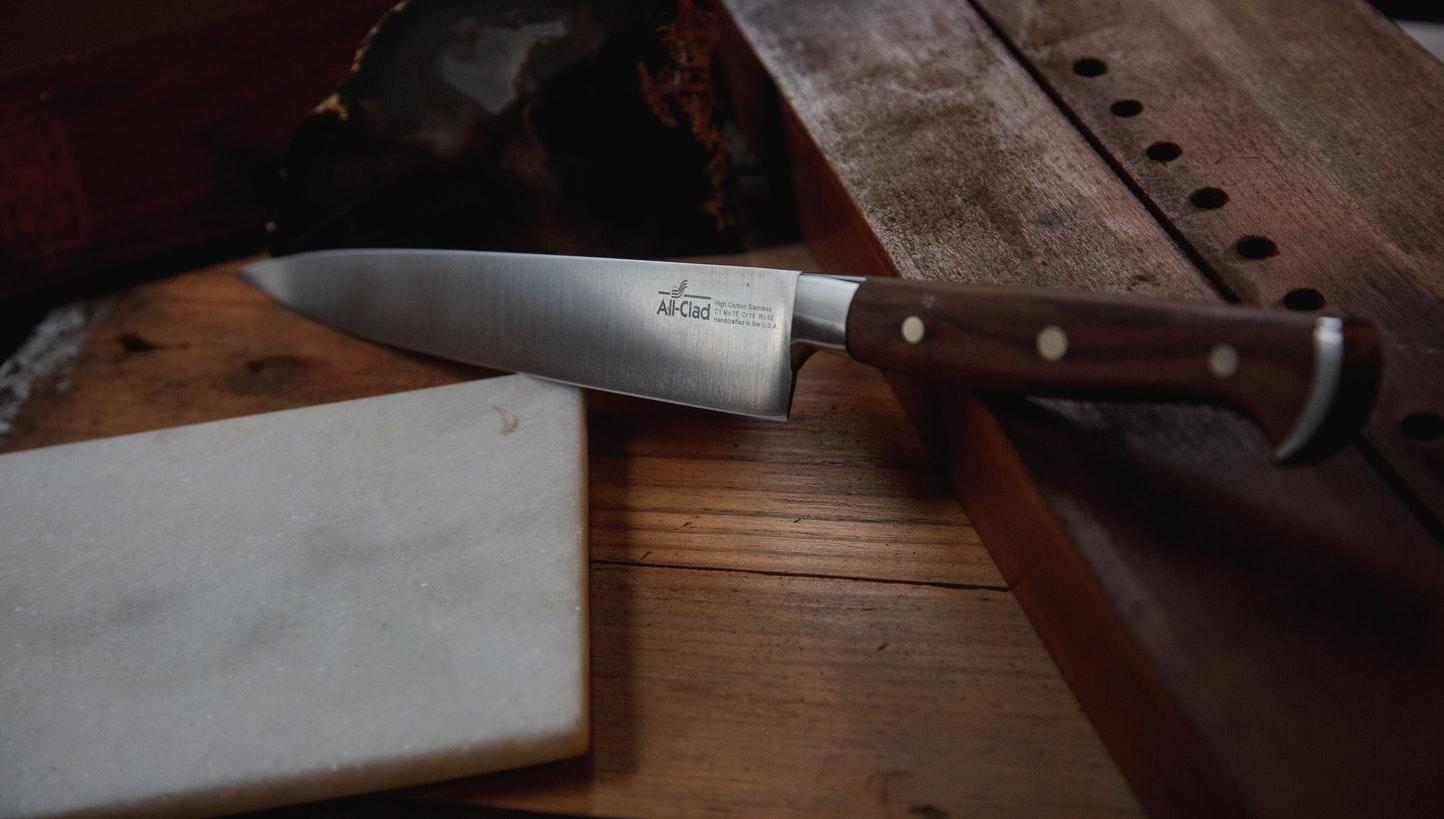
To make himono, the trick is to use a heavy, stiff, and very sharp knife, specifically a deba. Since most fish done this way tend to be small, it can help to have a small deba, about 150mm, sometimes known as an ajikiri—aji (鯵) is horse mackerel, an oily fish about the size of a trout that is plentiful in Japanese waters. I’ll devote a future column exclusively to the beloved aji, but for today let’s use the all-American favorite, trout.
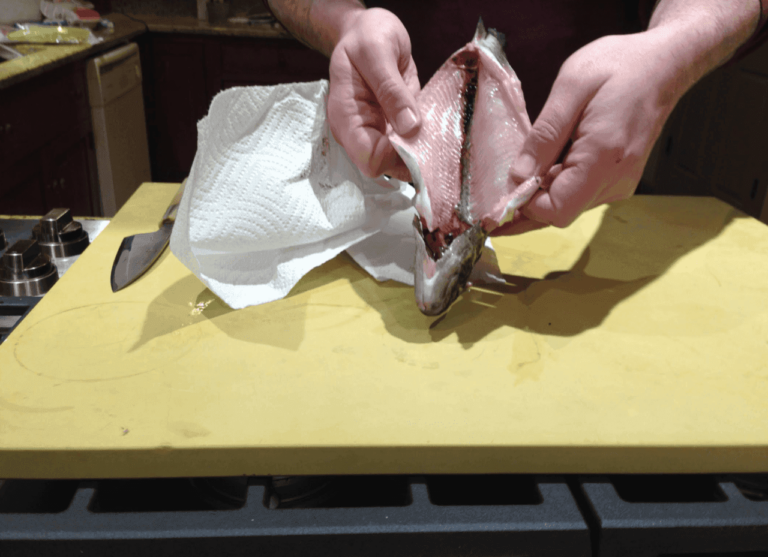
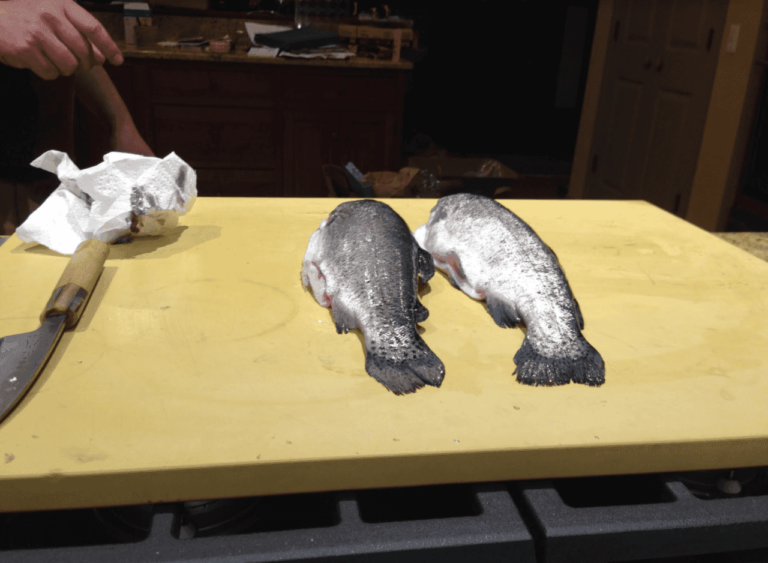
Ideally, you want fresh, whole trout straight from the lake or river, not gutted or anything. I’m going to assume you’re getting it gutted, as I am, but see below.
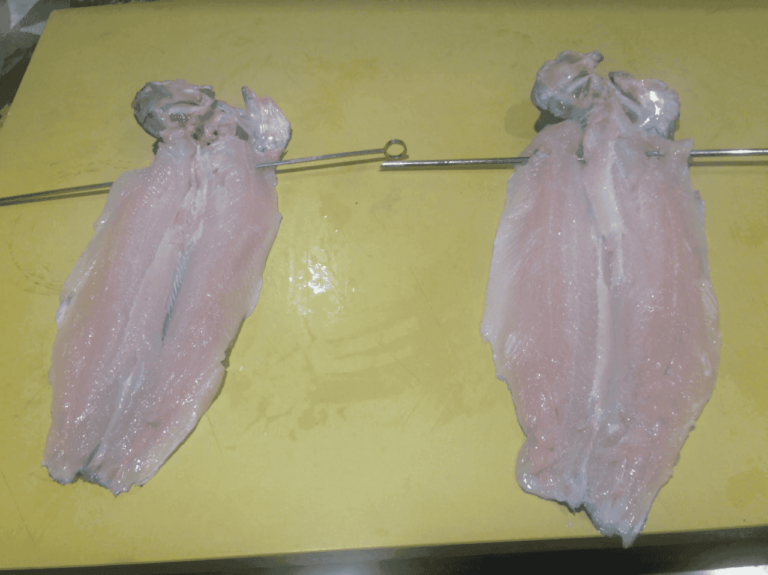
Cutting the Trout: Hiraki 開き Butterflying
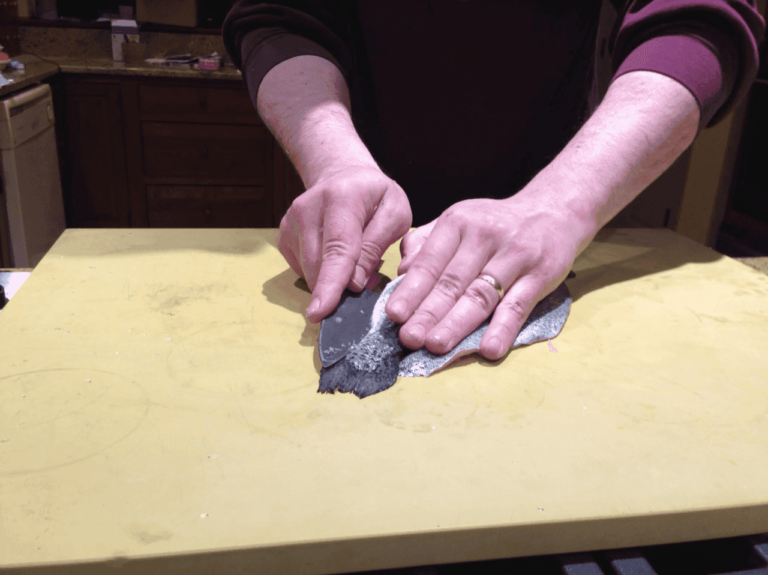
In what follows, imagine that your cutting board is laid out like a map, with North away from you, South toward your belly, and so on. For collectors: I am using a 150mm Masamoto KS deba.
Rinse the fish well, removing any brown bloody bits.
Place facing W on the board. With the deba’s tip section, remove the scales and slime by scraping gently backwards from right to left, tail to head. Rinse again and wipe dry with paper towels. (Note: Japanese chefs rinse fish again and again; this is called mizuarai 水洗い, water-washing. In some cases the rinse water has salt and/or sake in it.)
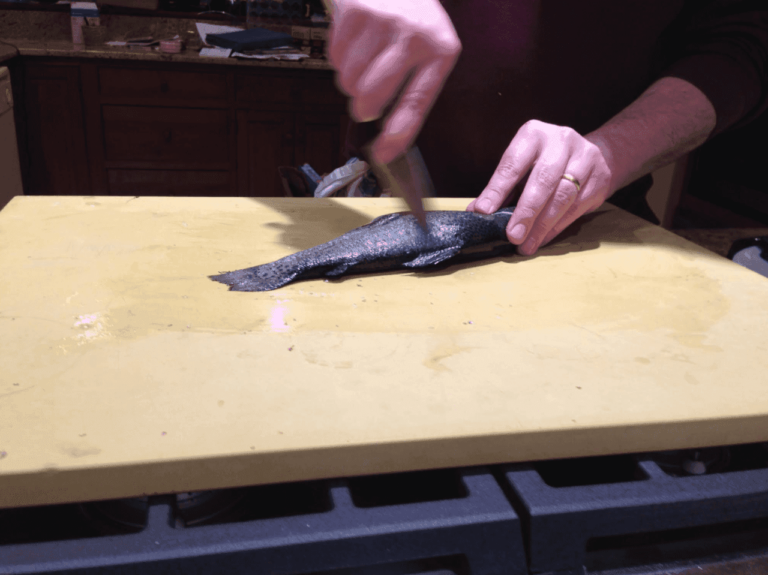
Lay the fish on its left side, head NE. Cut from under the chin to the tail, shearing through the pinbones, along the backbone, and to but not through the dorsal flesh. This will take multiple strokes.
The important parts are:
- keep the flesh lifted up out of the way as you go;
- use most of the knife blade on each stroke;
- keep the bevel down on the bones through the cut. You will shear through the fine pinbones in the process.
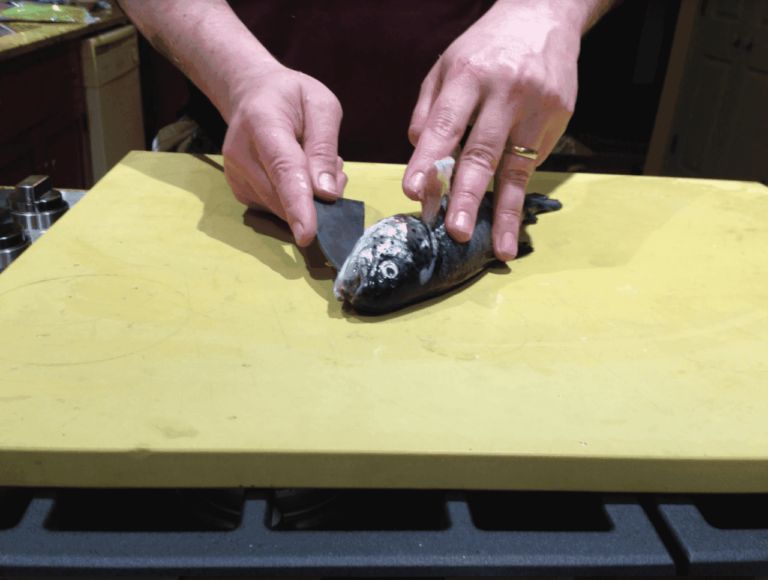
Roll the fish on its back, head SE. Stand the knife on its point, edge touching the throat, and with a firm, rolling motion cut straight down to split the head; you want to just split the forehead, not cut the head in half.

Now the fish opens like a book. On one side you have the backbone and most of the ribs, which we want to remove.
Spread the fish skin-side up, the backbone side SE, head SW. Using the same long draw-slice as before, cut from tail to head, separating the bones from the flesh.
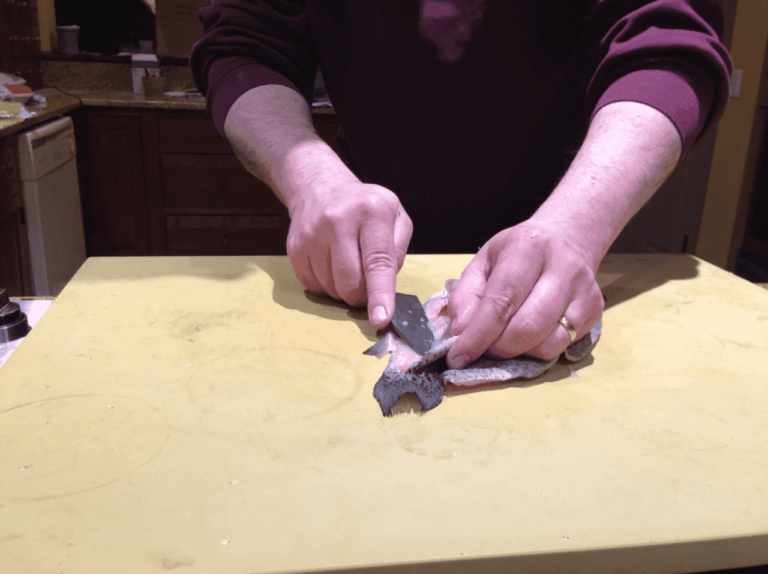
Rotate the fish 180 degrees, insert the knife bevel-side-up between backbone and flesh, lift up the flesh at the head end, and push forward gently to shear the bones from the head.

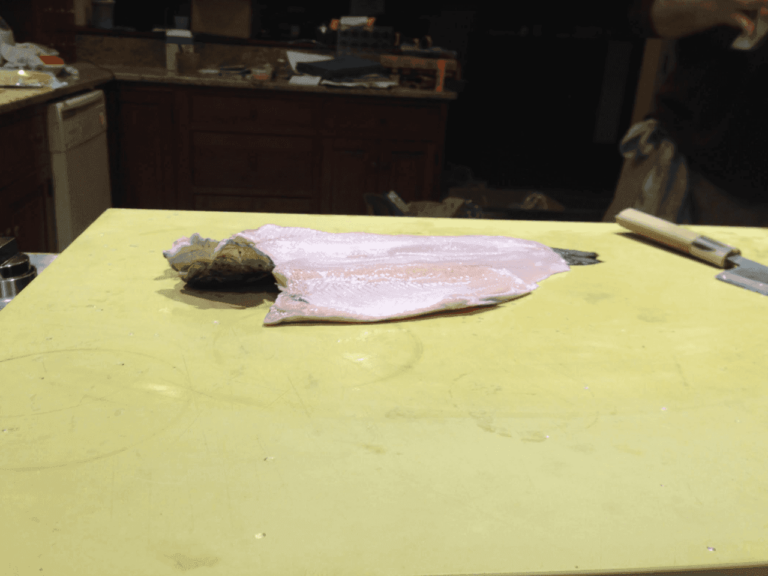
Open the fish flat. On its left side, slice under the ribs in a smooth, flat stroke. On its right, reverse the knife, blade up, and insert the point under the rib tips, then slice under as before.
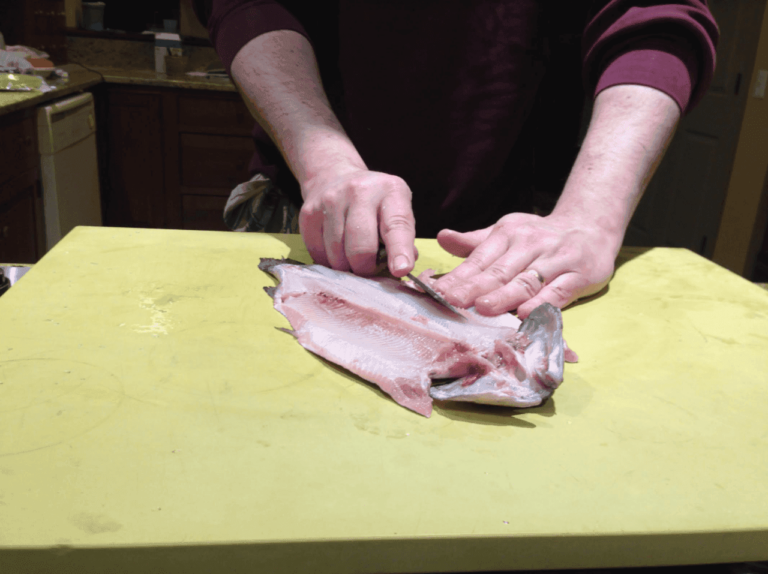
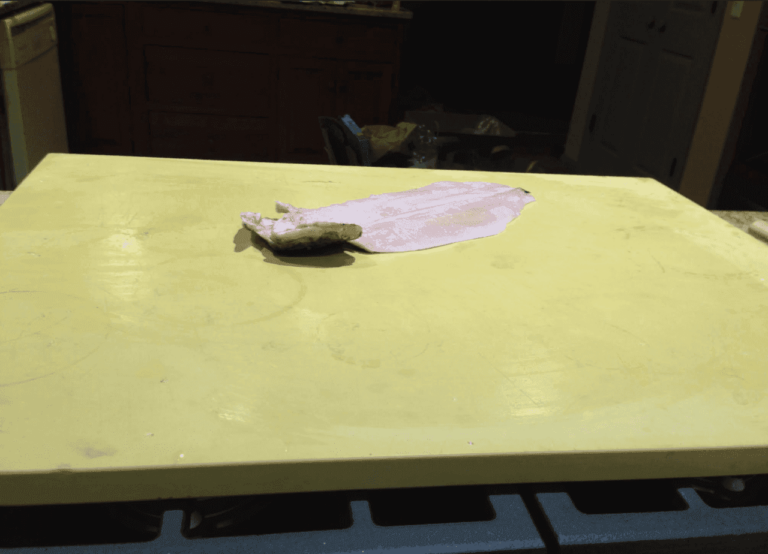
Examine carefully. Trim off fins and anything that is just skin. If there are red-brown discolorations, rinse them out, using a toothpick or the like to loosen. Rinse in fresh or lightly salted water, wipe clean, dry, and the fish is ready to cure.
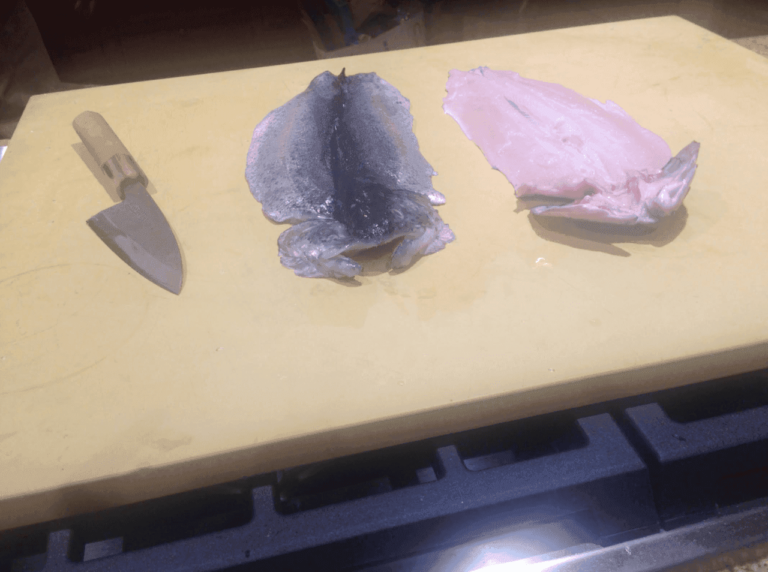
If the fish is whole, do the same process, but start with the tail NE, dorsal fin SE. Cut through the back, and don’t split the belly skin. Shear the head until you just split the jaw. Remove the gills and guts as you go along. You’ll find that this is much easier, incidentally, and it will sit better on the grill as well. (Some say hiraki requires starting from the back, but others disagree. Hiraki can also mean himono fish, oddly enough.)
Curing and Cooking the Trout
Make up a 2% salt brine with enough cold water to cover the fish in one container. (For 1 liter water, adequate for about 3-4 trout, add 20g (4 tsp) kosher or sea salt, and stir vigorously to dissolve completely.) Brine the trout in the fridge for an hour, then remove and pat dry.
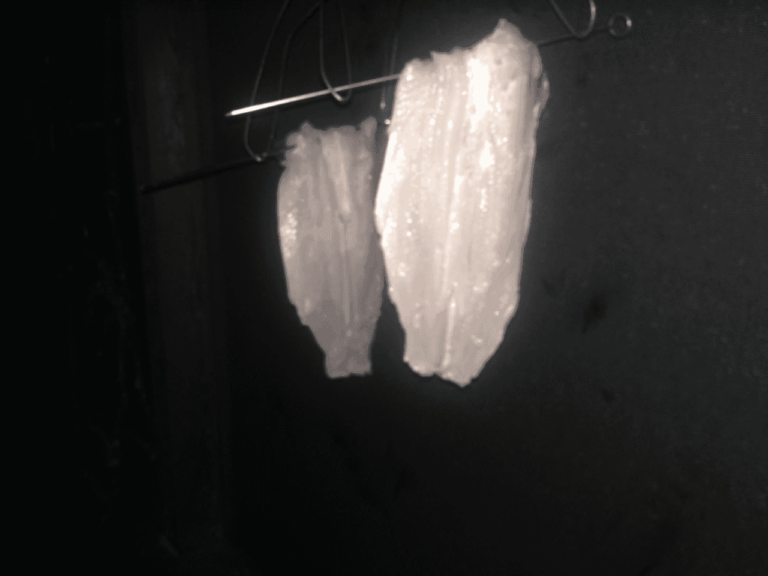
These days, you usually spread the fish, skin-side up, on a wire rack over paper towels in a cookie sheet, and refrigerate overnight. Traditionally, however, you take a long metal or bamboo skewer and thread it across the fish at the collar area, then hang in a cool, breezy place overnight; the outside temperature doesn’t really matter, as the fish will always cure, but weather variations will of course have significant effects on flavor. That’s a good thing!
Prepare a grill. You want the heat “intense but distant”—standard advice in Japanese cookbooks. (Could be worse: my favorite is this common ingredient quantity: “the appropriate amount,” 適量 tekiryō.) Best is to make a small charcoal or wood fire in a deep grill, and when it’s burned down to scary-hot coals, it will be intense but distant from the grid. Be sure the grid is clean.
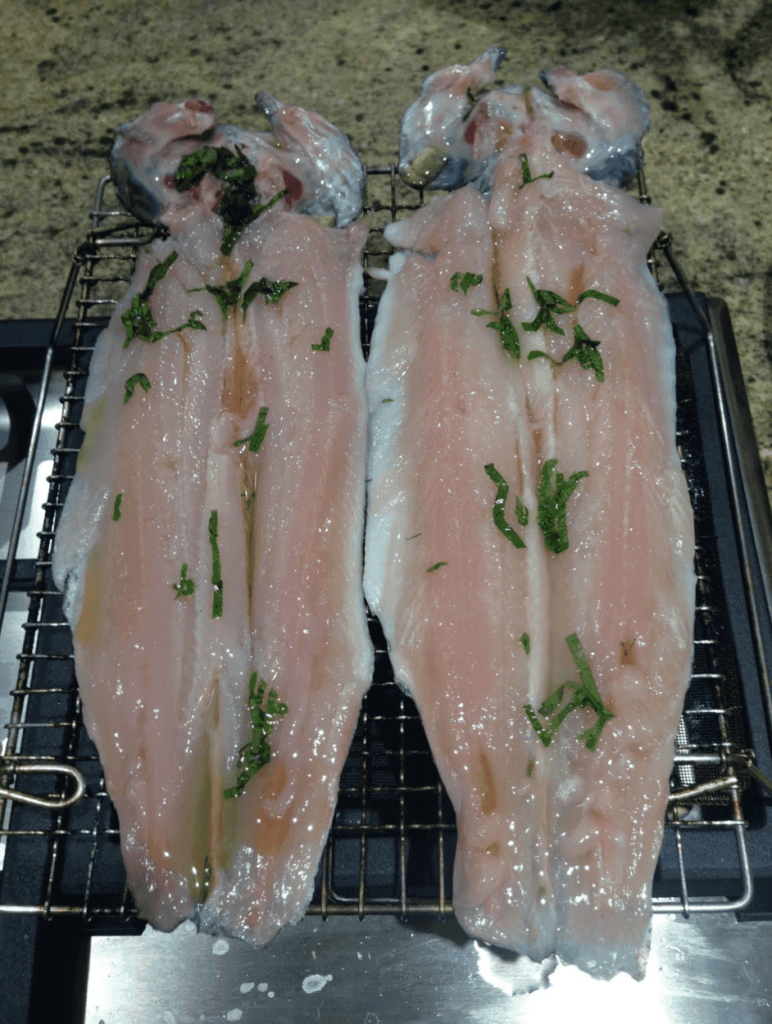
Make a basting solution (for 3-4 trout):
- 1/2 cup mirin (or 1/2 Tb sugar in sweetish sake)
- 1/4 cup soy sauce
- A handful of shiso or basil leaves
Mix mirin and soy. Roll leaves together, cut into fine chiffonade, and stir into the liquid.
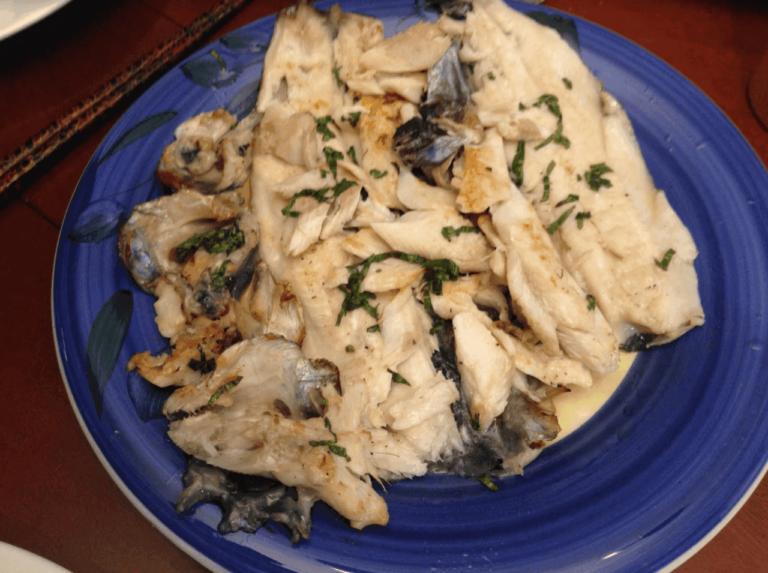
Grill the fish skin-side down for about 3 minutes, brushing with the solution occasionally. Turn and cook another 4 minutes, continuing to baste. The fish will be well-cooked, with brown, crispy skin and beautiful browning on the flesh. Serve immediately.

To eat, simply reach in with chopsticks and yank some out. Most of the small bones are so dried by the heat and salt that you can just crunch them up. Be sure to eat the skin. The most succulent parts are on the outside of the head, especially the cheeks.
Variation A
Use the smallest, sweetest trout you can find; you’ll want 1 per person as an appetizer, or 2 for the main course.
Once the fish is clean of guts, slime, and scales, do all rinsing in a 50/50 mix of sake and cold water; the sake can be inexpensive, but you should be able to drink it. As you finish each fish, put it in more of the same mixture in the refrigerator. They should all get at least 10-15 minutes.
When grilling, the basting is optional; maybe give each person one basted and one not. The bones on these are so thin that you can usually crunch up the whole, beautifully browned head if you wish.
Variation B
Use full-sized fish, and instead of the grilling glaze above:
- 3/4 cup excellent sweetish sake (consider a nigori variety, and chill more to drink with the fish)
- 3-4 egg whites (1/5 the volume of the sake)
Stir the whites with a fork or chopsticks until broken up but still completely liquid. While continuing to stir, steadily pour in the sake. Let stand in the refrigerator for 25-30 minutes, covered, to let bubbles break, then stir again. Strain to be sure it’s completely smooth.
Just before grilling, cut each fish into fillets, then crosswise into 2-3 chunks. Be sure the grill grid is narrow enough that the pieces won’t fall in. Bank the coals to one side. Grill the fish pieces exclusively on the skin, basting often. If one starts to burn, pull it to the side of the grill.
As it cooks, the glaze will turn white and puff slightly.
Variation C
Use butterfish, cut the same way. Instead of the brine, marinate for about 40 minutes in this mixture:
- 1 cup soy sauce
- 1/2 cup mirin (the real thing, or very sweet sake)
- 1/3 cup sake (it must be passably good sake)
Blot dry with paper towels, but don’t rinse. If drying outdoors, be sure the weather is cool—if the fish freezes a little bit in the process, that’s fine.
Note: you may need to adjust the marinating time based on how fat the butterfish are.