Knife Making and Maintenance
How To Rehandle A Western Style Handle
02.09.2015
 Sometimes you want to replace your knife handle. It could be an upgrade to a nicer premium exotic wood: burl woods, spalted woods, or curled hardwoods. Maybe the scales have warped and pulled away from the tang, leaving a gap for bacteria to grow and rust to form.
You could always pay a pro to do it, but for the DIY type with some tools and a burning desire to make something, it can be rewarding to make something of your own.
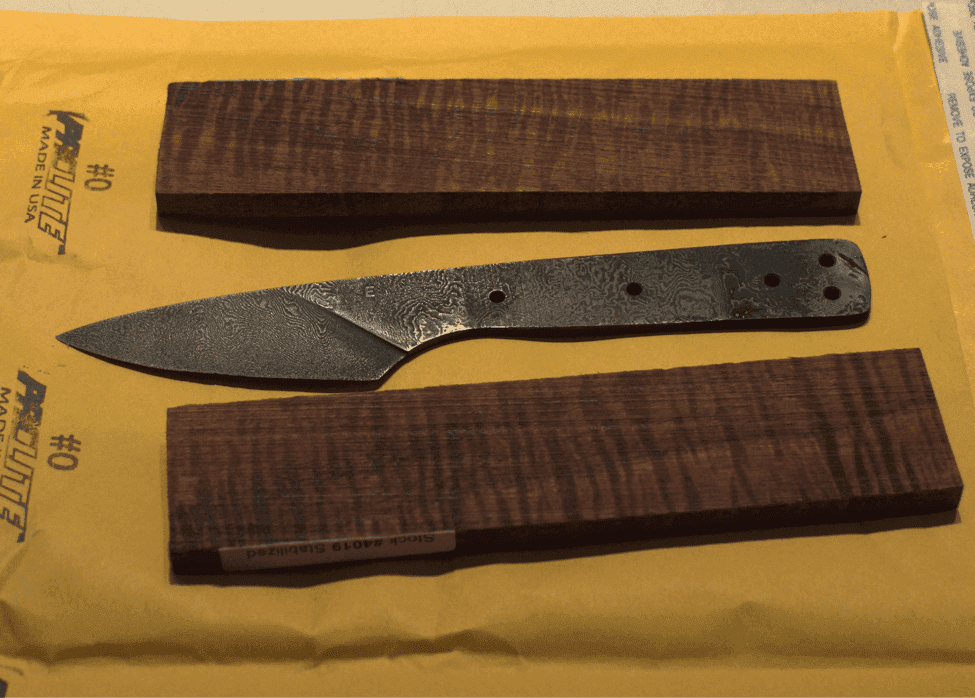
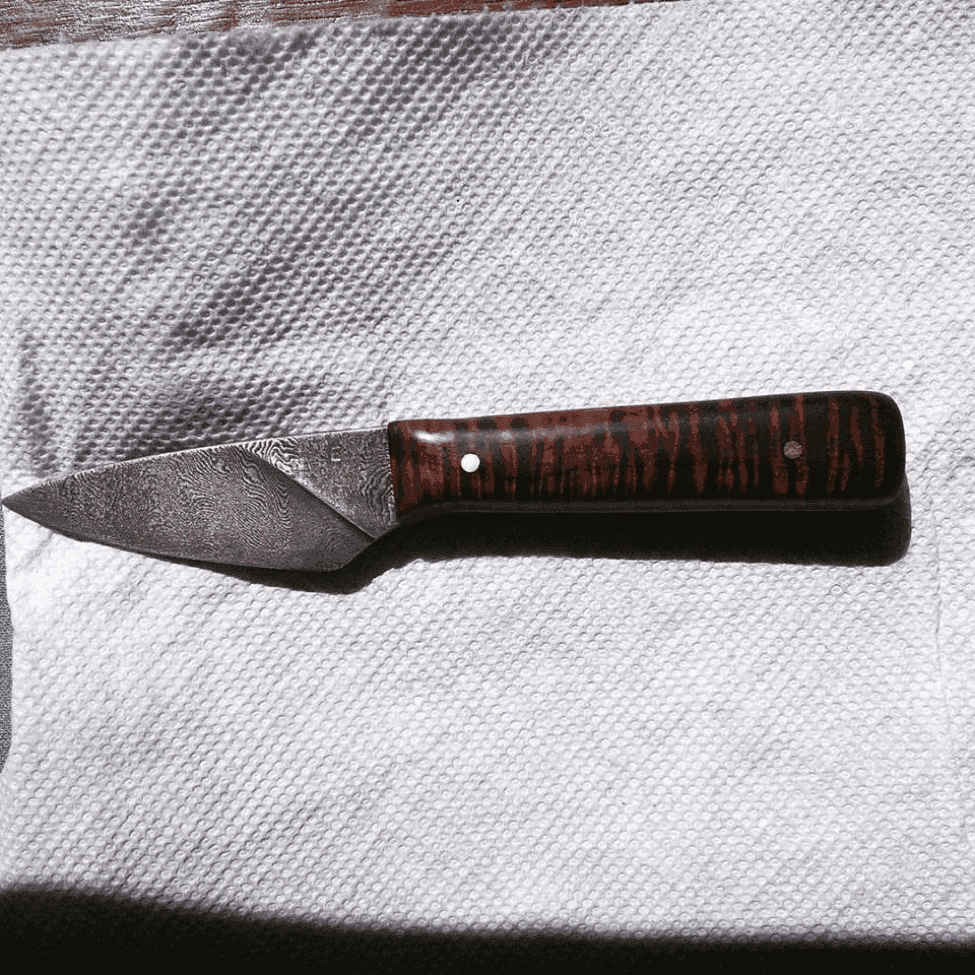
For this article, I bought a Damascus paring blank made by a top American knife maker, and I’m making my own handle from a very nice Koa wood from Hawaii.
THE PARTS
A western handle has two scales on either side of the tang. I could be made from wood, resin, or even mammoth molars! You can buy them already cut or cut your own. Here are some Koa wood scales for a paring knife handle.
I’m using a simple ⅛” brass rod for the pin here
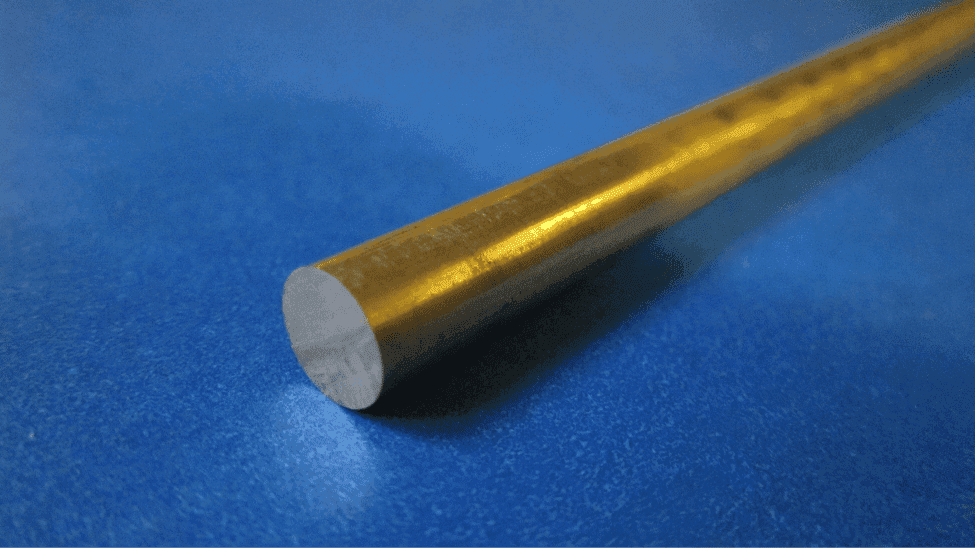
I’m choosing not to peen the ends because I like the small, understated look of the pins. I’m using a premiuim wood and I want to highlight that.
PUTTING IT TOGETHER
Once I have all the parts ready, I trace an outline into the scales. I like to drill the holes for the pins before cutting the wood. The pins help line everything up before you glue it together. I’ll cut it a little bigger, because you can always file or sand it down, but there’s no adding wood. This is a tiny paring knife, so I’m not using a bolster. If you did have a bolster, this is the time to make sure the handle is flat and flush with the bolster.
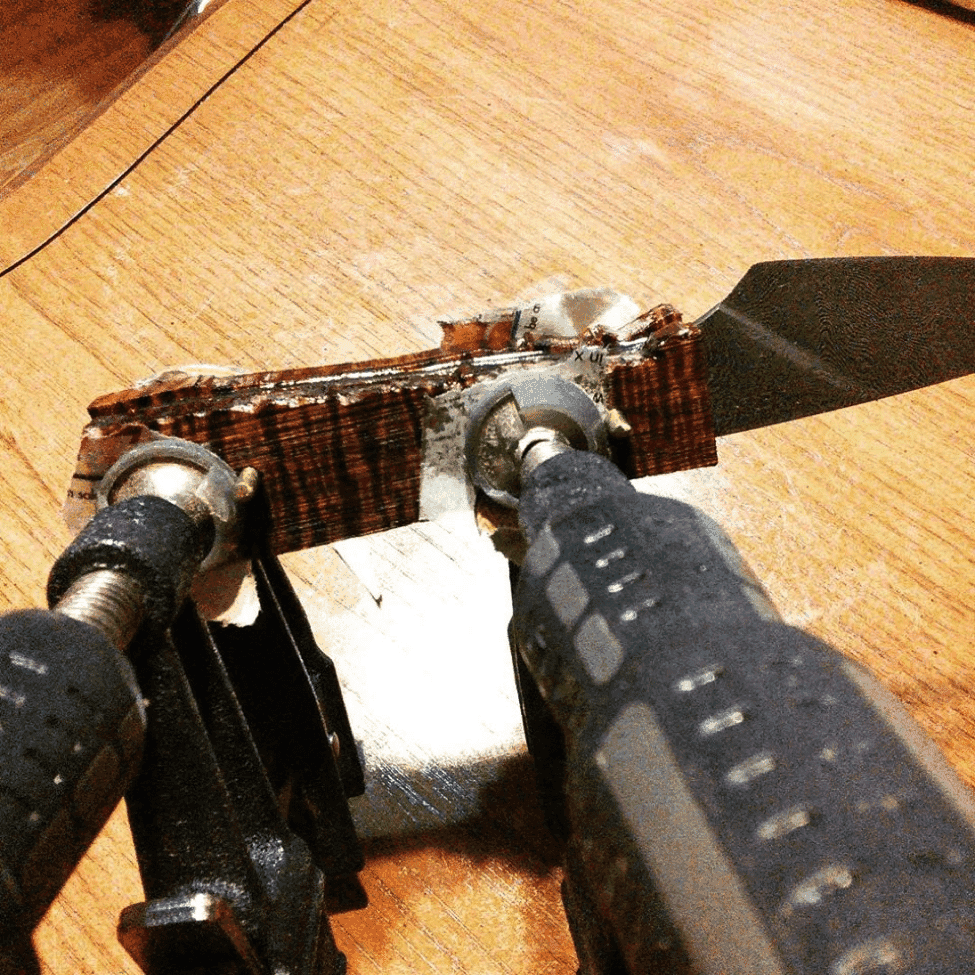
Before epoxying, I like to rough up all surfaces with 60 grit sandpaper so the epoxy has more surface area to stick to. I use G-Flex epoxy, which was made for boating applications. It allows a bit of flex without breaking and handles moisture better.
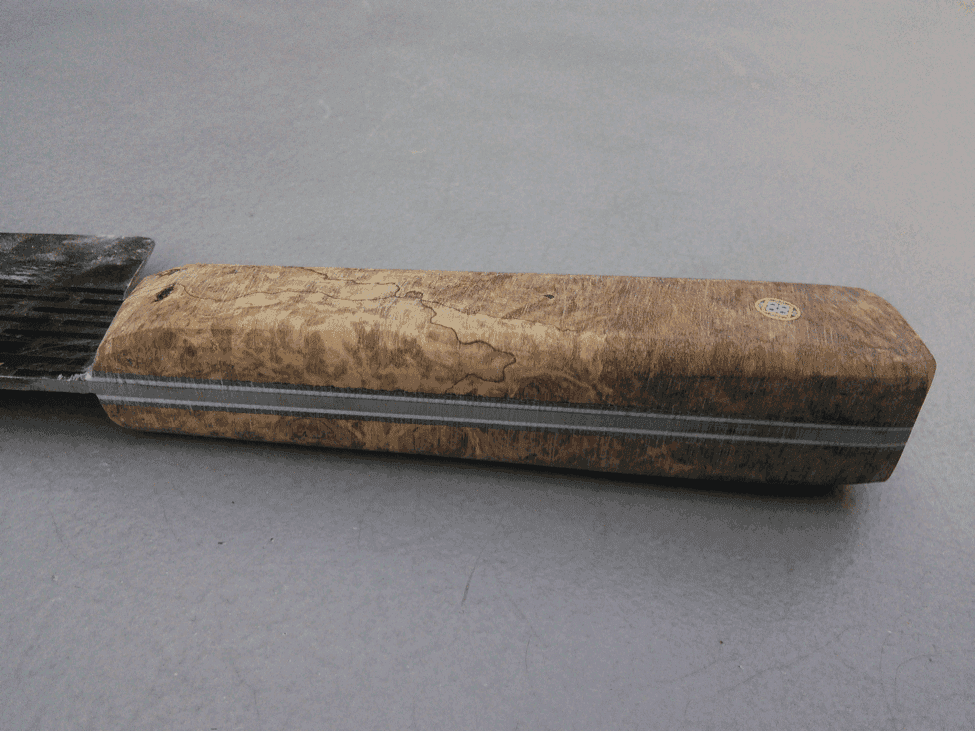
Here it is all clamped together:
Once the epoxy cures, you can shape the handle. I use a combination of belt sander and hand tools for this task. People like different shape handles, but I’m trying to make the cross section less square and more oval.
FINISHING
If I’m happy with the shape, I’ll take the entire surface up through a sandpaper progression from 200 to 1500 grit. By 1500 grit it will be very smooth and even shiny. Some people leave it unfinished like this, depending on the wood. I like mine to be a bit more water resistant, so I will finish it with a mixture of raw linseed oil (flaxseed) and beeswax. Boiled linseed will dry faster, but it’s not food safe.
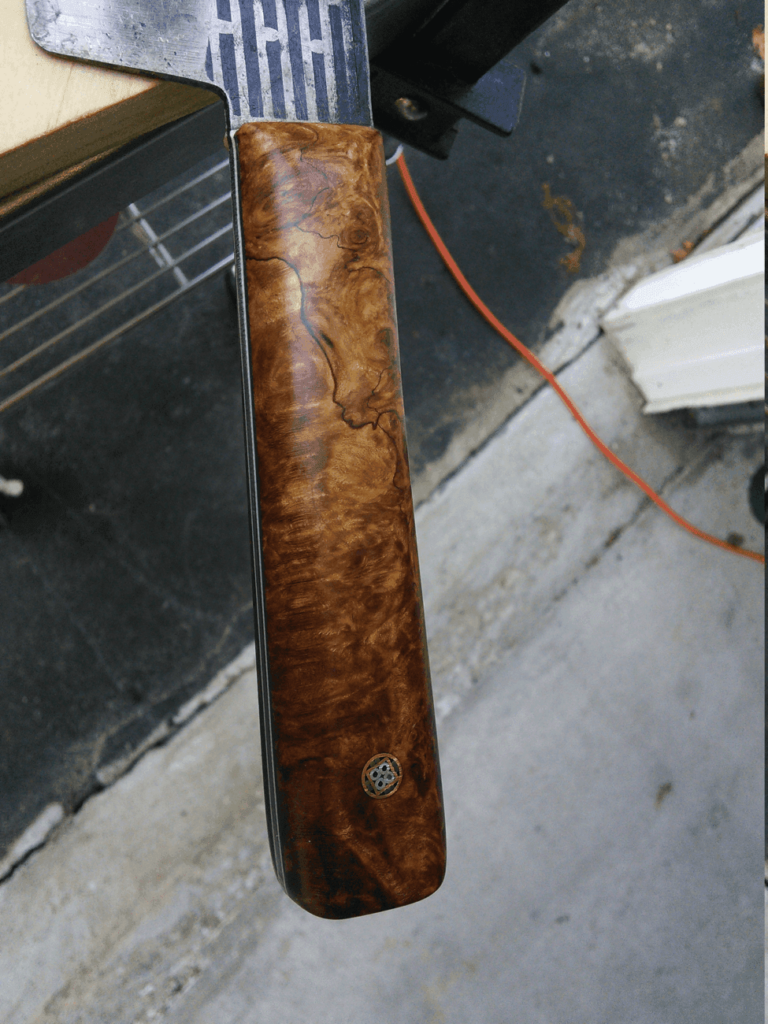
At this point, you can sharpen the knife, etch the damascus, etc. and polish up the blade. Here is my finished custom paring knife:
ADDING SOME BLING
I’m firmly rooted in the less is more camp. I want the blade and the wood to stand out. Of course, there are other schools of thought. Here’s one that I made with plastic spacers and a mosaic pin.
You can also add a bolster or an end cap. Functionally, those keep the water away from your wood too.